Guide:
Understanding and Constructing the Shapes of Fur
Fur can be a tricky thing to draw, and it's sometimes hard to figure out how to get it to look just right. In this guide, I will show you a technique that helps break it down a lot easier, with the goal of helping you understand fur more in general.
This guide does not go into shading or realism, but merely a method of formulating the shapes. Let's get to it!
Basics: Ascending the Mountain
Before we can start building some fur, we will first need a surface.
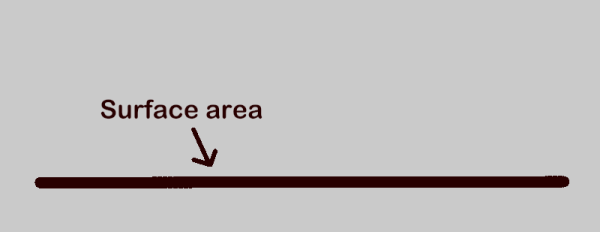
We will be starting with a simple flat surface for this first section. In order to start making some fur, we need to create some peaks - some mountains, if you will.
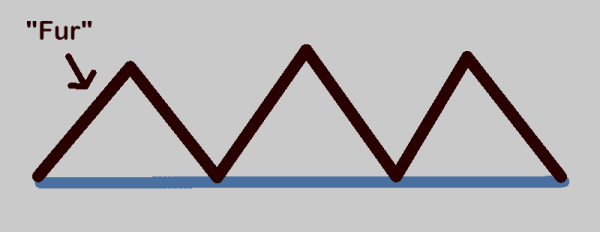
These large triangles will serve as the basis for the fur we draw. However, you may already be thinking something like: these large triangles feel very unnatural and dissatisfying, they don't bring joy, and that they certainly don't feel like the basis for some good fur. To continue onwards, we need to start breaking them down into smaller triangles.
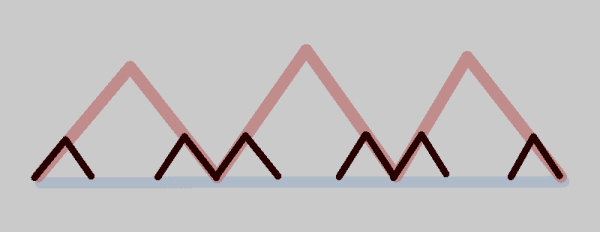
To start, we create smaller, evenly-sized triangles within the corners of the large triangles, where they touch the surface. We leave a space inbetween them, but you can also select them and separate them manually if need be. Now, we make some taller triangles inbetween the smaller ones.
We have begun to build a pattern! However, one key problem here is that the equally-sized smaller triangles are right next to each other, creating a similar unnatural feeling as when we only had the largest triangles. To fix this, we will need to socially distance them.
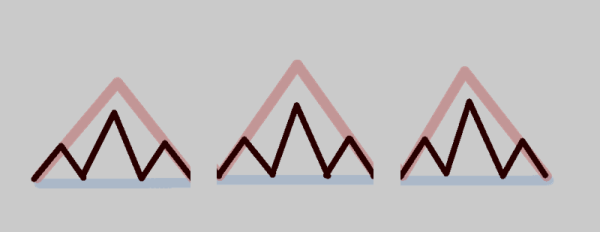
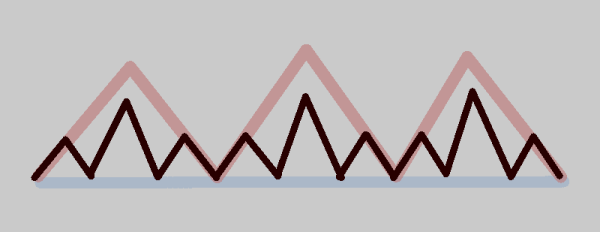
And now that our mountains are safely distanced, we can fill in the gaps with even smaller triangles to finish it off.
Look at that! A basic, but slightly more pleasing pattern!
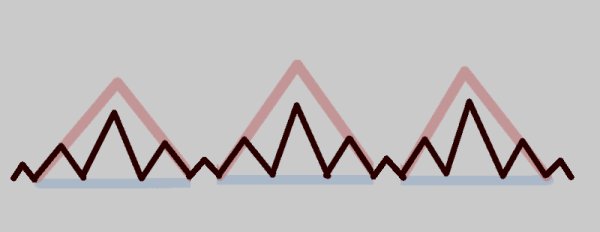
The key basics to take away from this initial section is that the shapes slowly ascend and descend in relation to each other, like a mountain slope or a set of stairs. If the shapes next to each other are the same height, it doesn't feel natural or satisfying, due to how we innately recognise and perceive patterns.
But now that we've made some cool triangles on a flat surface, how can we apply that to fur?
The Next Step: Patterns upon Curves
Sadly, we must now ditch the flat surface in favour of our new, cooler friend: the curved surface.
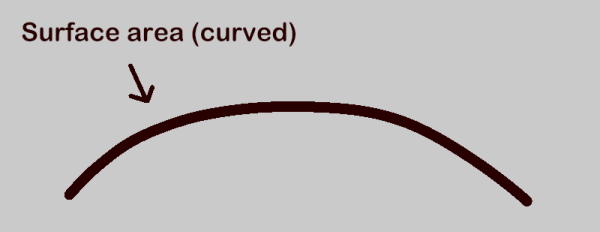
When drawing fur, it can be assumed that you're drawing an animal of some kind, and living beings generally have curved surface areas. As such, we will now start building our triangles again, but on the curved surface instead of the flat one.
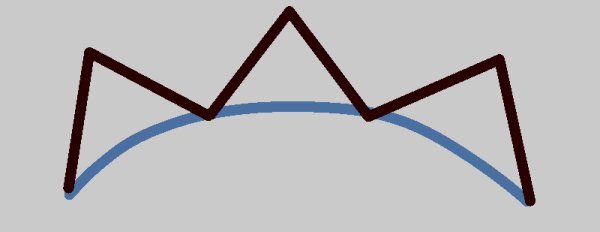
Due to the curving, our triangles have to be adjusted to follow our new surface area. This is an intended feature, though! As with before, we will now break it down into smaller triangles, and fill in the socially-distanced gaps inbetween with the smallest triangles.
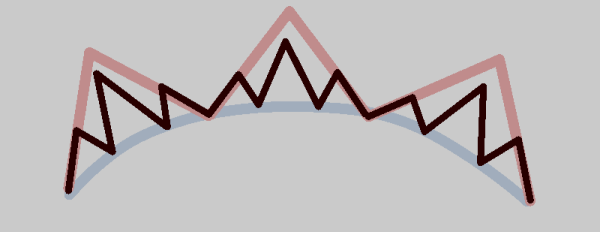
Already, the curve is having an interesting effect on the shapes of our triangles. If you were drawing a spiky-furred creature, these triangles would already probably be acceptable for a finished piece, since the curve inherently gives the shapes a more natural feeling.
Isn't the power of patterns and pattern recognition incredible?
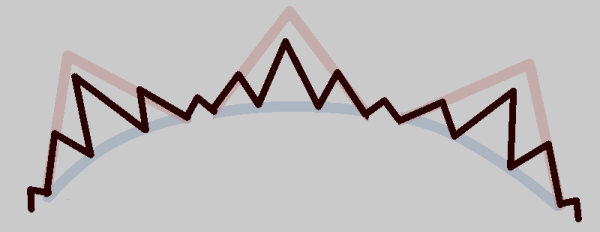
With this new curved shape and our smoothly ascending and decending peaks, we can use this as a basis for drawing soft fur shapes!
Doesn't that just look soft and floofy?
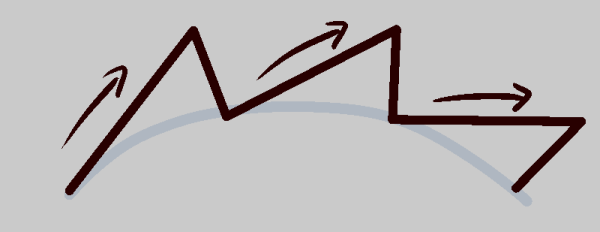
It Goes Deeper: Directional Flow and You
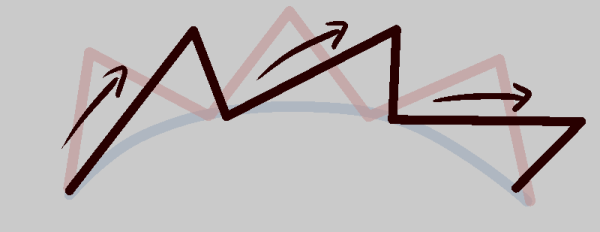
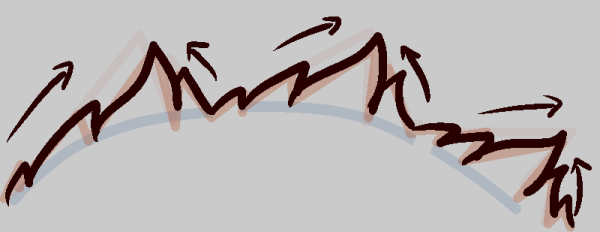
Hey, that was a pretty decent surface of fur, right? One thing you may or may not have noticed is that our triangles automatically had a directional flow, as demonstrated below:
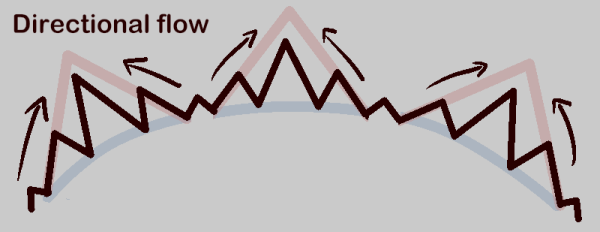
Our largest, base triangles had their "peaks" simply pointing straight upwards, so the smaller triangles within ended up flowing in the direction that followed the peaks. Makes sense, right?
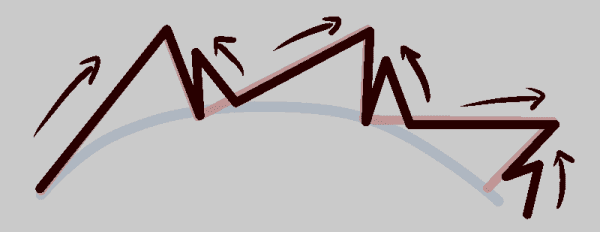
We can, however, play with this concept a bit! What if we made the largest, base triangles flow more strongly to the right?
Interestingly, this has an effect of making the largest triangles seem slightly more natural, since they now follow the curve and flow of the surface area we have.
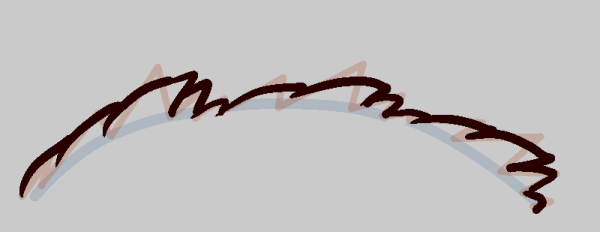
Following this, we can do our usual routine of breaking down the largest triangle into some smaller ones, keeping in mind all that we learned about ascending and descending patterns.
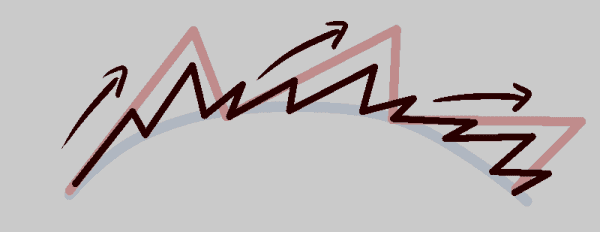
Our small triangles may break outside of the guideline of the largest triangles while we do this, but this is completely fine and natural.
And, boom! When we implement the power of directional flow, our base spiky fur shapes end up looking even more natural and good. With this as a guideline, you can draw some pretty decent fur shapes.
So soft! So floof!
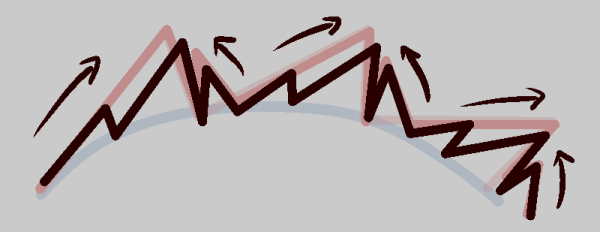
But Wait, There's More: Oppositional Flow
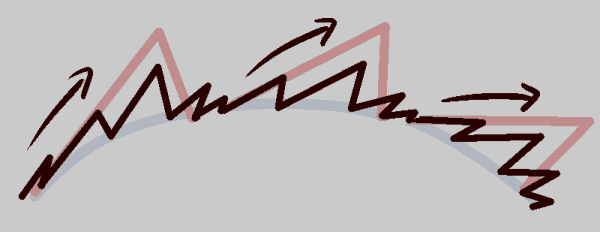
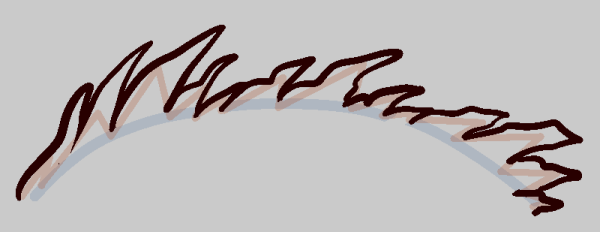
Not all fur will just flow in one direction, and we can use our triangles again to gain a better understanding of that concept. Let's bring back our base triangles again from the last step.
Instead of starting to build our smaller triangles straight away, we can add extra shapes to our guidelines. Only now, our largest triangles have slightly smaller ones pushing against them.
In some ways, it's like the smaller triangles are providing structural support for the large, leaning ones. This may currently feel similar to when we had no strong directional flow and when it all flowed straight upwards, but a difference here is that there is still some flow at all - the triangles lean slightly more strongly to the right.
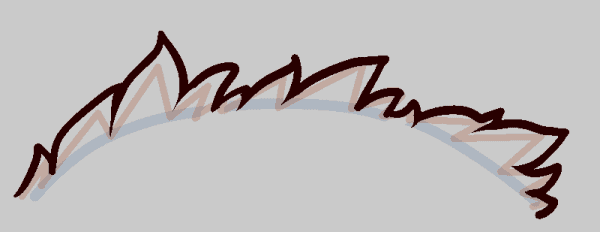
As per usual, we can slowly break the shapes down more and more until it feels adequate.
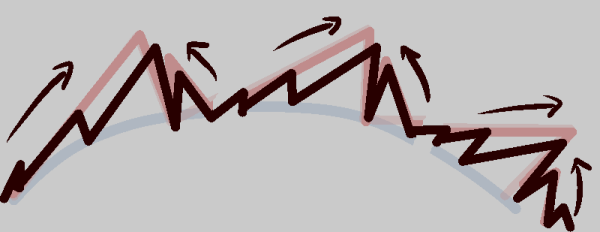
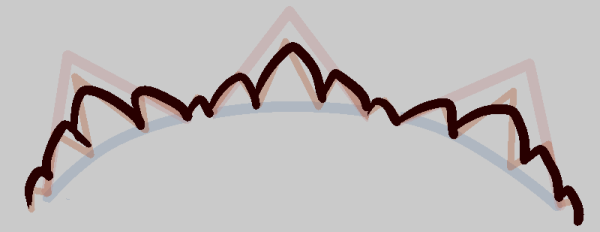
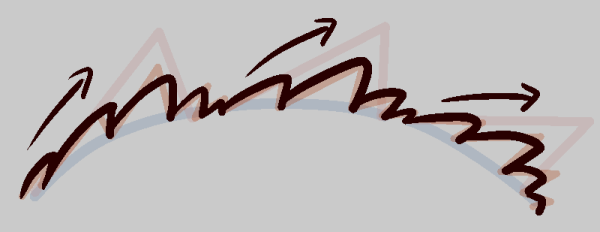
With the shapes having some oppositional flow, we can do some interesting things if we use it as a guideline for softer fur. The shapes in opposition can be used to create fur that flows against itself.
See how the fur at the "peaks" curves against the slightly smaller peaks? This is how we can use oppositional flow to our advantage!
In Closing: We Did It!
Using all that we've learned from our triangles and peaks, we can apply it to just about any shape or style of fur. Some require more effort than others, but the key thing is that we now know a bit more about pattern recognition in fur, and how to build those patterns.

As some observational exercises, think about the following aspects when you look at the art of people on the internet, or when you look at your own work:
- Does the fur they draw have ascending and descending patterns?
- Can you see any directional flow within the fur they have drawn?
- Is any oppositional flow present?
- Does the fur look good?
- If so, why does it look good?
- If not, what makes it feel dissatisfactory? How would you improve it?
- (note: while you observe this, do not draw over the art of people on the internet without their permission (even to "improve" it), and do not critique them if they did not ask for critique.)
- In what ways can you apply these techniques to your own work?
Page originally published on 18th March 2022 at 11:53 UTC.
Affiliates:


![]() All written content and non-official Pokémon artwork on this site belongs to Bluwiikoon, unless stated otherwise.
All written content and non-official Pokémon artwork on this site belongs to Bluwiikoon, unless stated otherwise.
Please do not repost or redistribute my content, and instead link to the original pages.
For more information, read my terms of use.
Pokémon, Nosepass, and all related characters © Game Freak, The Pokémon Company, Nintendo, etc.
This website is fan-made and not affiliated with the aforementioned companies.
Check out the main Bluwiikoon Artwork site for cool links to my other stuff!

